I had this in recently for a dead brushroll, and before I even got round to that, I noticed that the motor sounded a bit peaky...
Quick message to the owner and he agreed to a new motor, and once I got the brushroll diagnosed, a new brushroll motor too. The parts arrived last week, and I got to it. Realising there is no how to guide for the main motor (apart from one buried in another thread), I thought I would give it a try!
INGREDIENTS:
New DC24 Motor assembly -
https://manchestervacs.co.uk/Dyson/DC24-motor-917281-02-YV-07K24New Post motor Filter -
https://manchestervacs.co.uk/Dyson/DC24-Post-Motor-HEPA-FilterT-25 Torx driver
So, wand, hose and cyclone off and out of the way.
Recline the machine.

Undo these three screws


You want to unplug this connector block

Next, you need to remove this thin white wire from the plug

because, as you can see, it needs to plug into the block on the new motor
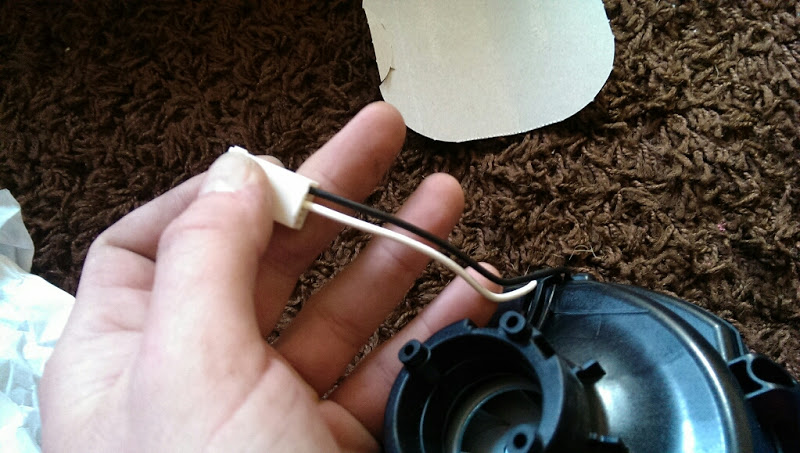
Using a tiny screwdriver/pin/SWMBO's tweezers, push the locking tab up, and the connector pulls out


Then, remove the screw as shown.
Over to the other side, and remove the lower hose

Then remove this screw that sits under the hose

Remove the filter cover, and the filter

Rotate the ball so you can see the 4 screws, and remove them. Lift off one side of the ball, then rotate the other side and lift off the other. Pulling gently on one side, pull until the motor assembly pops out of the locating holes in the chassis

The Yolk comes off easily now

You need to salvage these three bits off the motor housing. If your tiny cog is ruined, you need one of these -
https://manchestervacs.co.uk/Dyson/DC24-Bearing-Ball-923685-01
Take the larger cog. If it sounds a bit dry when rotating, pop it apart and smear grease over the ball-race. Then, fit it to the motor housing, so the locating lugs align with the motor housing cutouts, and the large lug protects the cables

Clean up and refit the seal

Fit the other bearing onto the spindle on the other side, then slide the housing back into the yolk

Then slide the yolk and motor housing back onto the chassis, the small cog side fits into the chassis, and the 3 screw holes on the wiring side must line up

Refit both screws onto either side of the motor housing. Then, plug the small wire into the new connector block

and plug the connectors together, and tuck the cables into their respective places

Refit the ball by placing one side over the bearings, rotating it to the back and placing the other side on top. Screw up and check for smooth operation

Fit your shiny new filter to give the new motor a great start in life

Refit the cable cover

Refit the side hose, (and the cleaner head if you removed it) and check the recline operation for smoothness. Hopefully, you should be job jobbed!
Intregued as to the state of the old motor, I whipped it out of the housing and popped the fancase off


If it didnt spark visibly through the housing with the filter removed I migth have been tempted to clean it up and save it, but it was too far gone sadly, killed by paper...
Hope this helps anyone out there attempt this quite easy job!


