The World's #1 Vacuum Cleaner Advice, Repair, Discussion & Information Forum

Author Topic: Dyson DC26 City Stripdown, repair and Refurb  (Read 27770 times)

Offline beko1987

  • Member
  • Posts: 5044
  • Country: gb
  • Gender: Male
  • Let's take it apart!
    • My blog
Dyson DC26 City Stripdown, repair and Refurb
« on: February 18, 2015, 10:42:54 pm »
A few years ago, my Dad bought a Dyson DC26 City. After a few months, he declared it utter rubbish, and relegated it to a cupboard and bought a Miele S7 which he should have done in the first place...

When my stepbrother got his own shell of a house and they moved in, he acquired it. He then used it as a shopvac until it didnt suck up anymore, and they banished it to a cupboard.

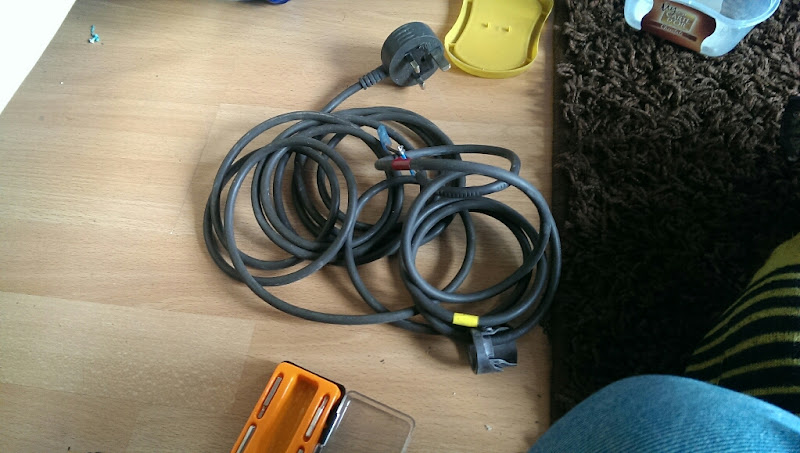
When we went to visit them the other week, his girlfriend threw this at me and kindly asked if I would remove it from the premesis...

So, it's been about a bit then...

Was also looking a bit sorry for itself

Put it in the car and came home


A few days later, I had a closer look


Mmmmmm I wonder why that's doing that...


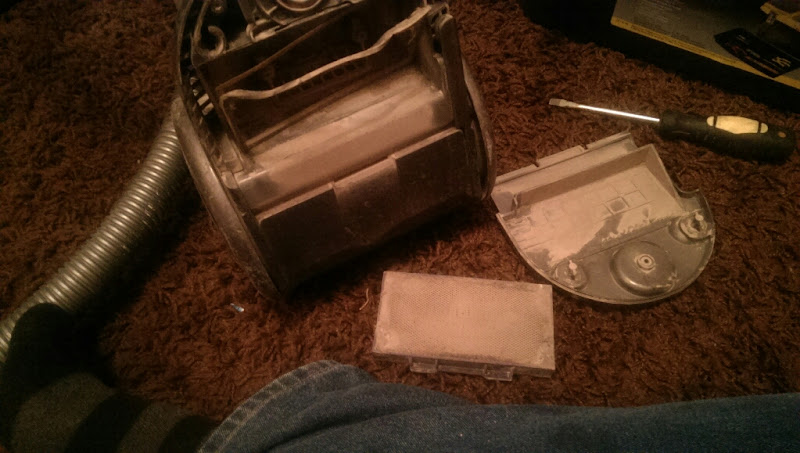
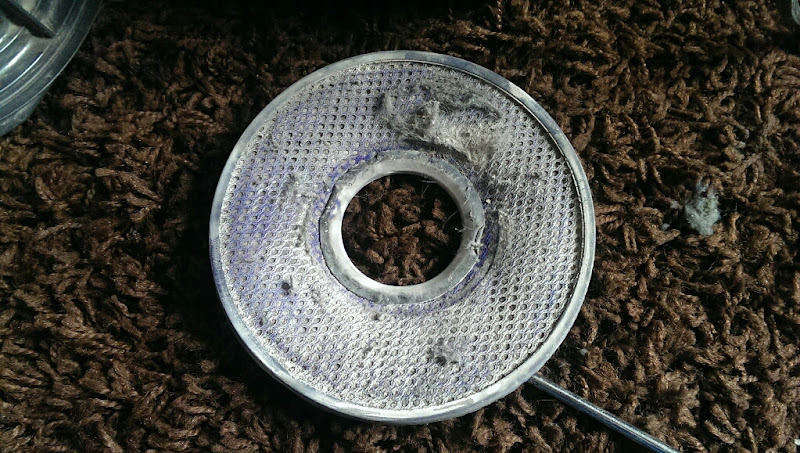
I doubt that will wash up... Lets have a look at the pre motor filter


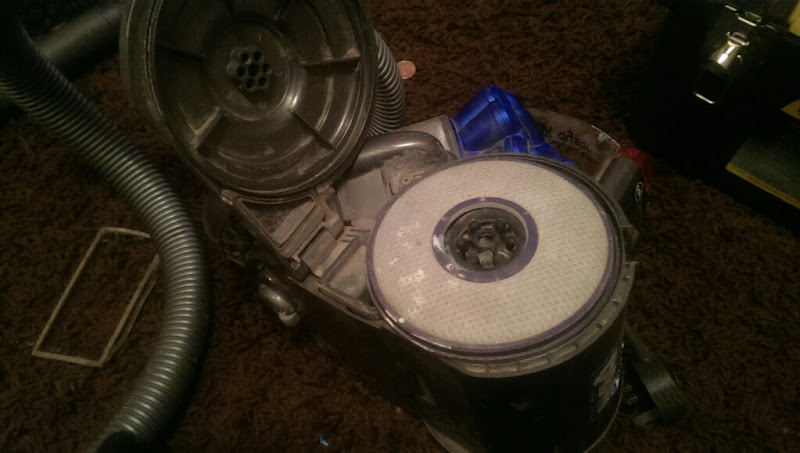
That picture doesnt really highlight how shite the filter was
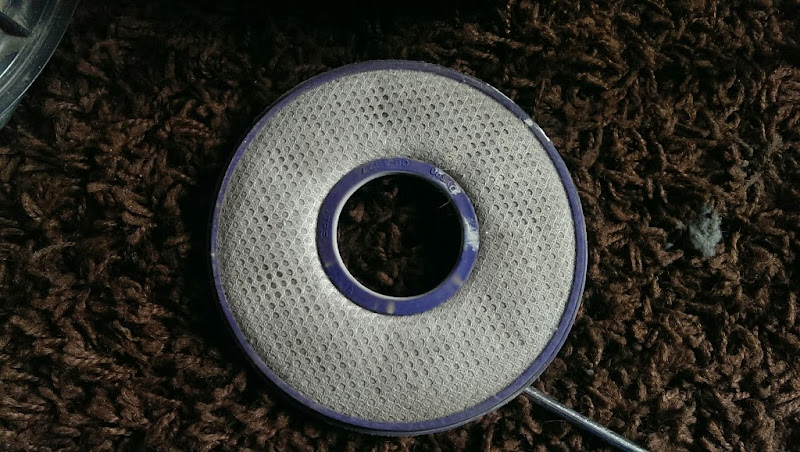
Ah, this one does


Crap all in the fan blades


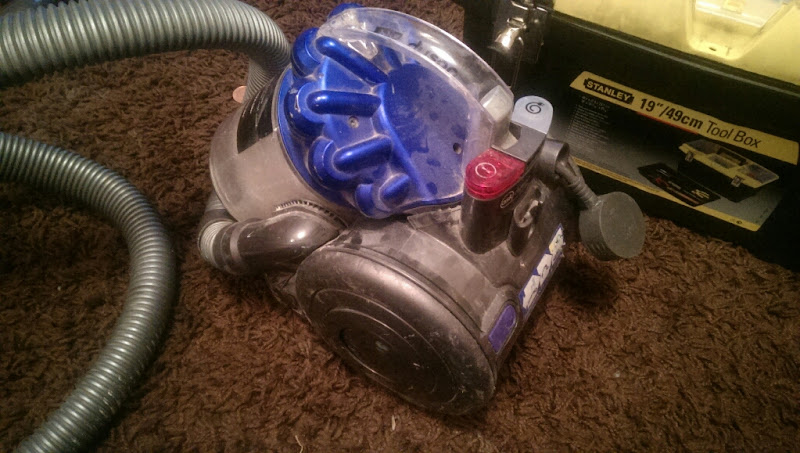
Surely the cyclone can't be that bad?


Yep!

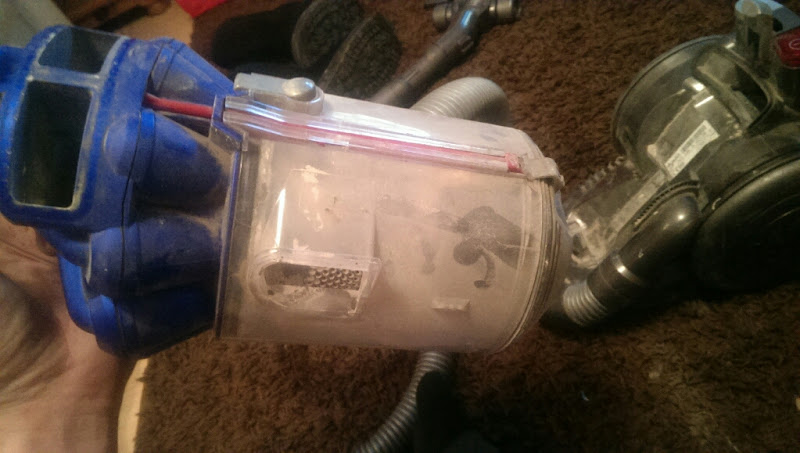
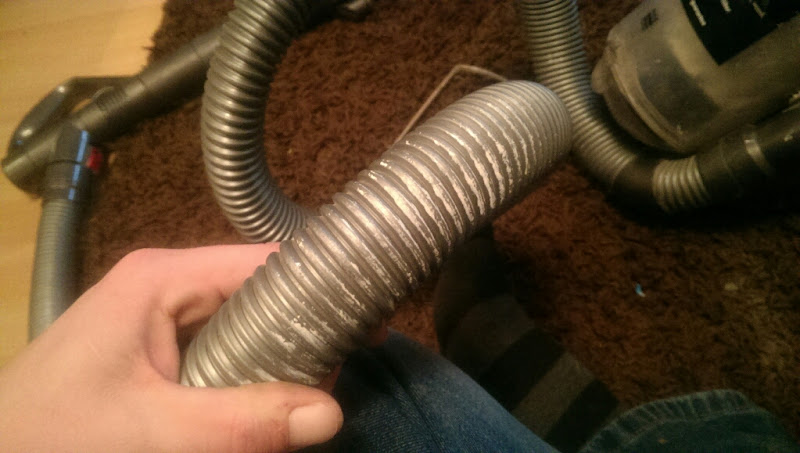
Not even the hose escaped punishment


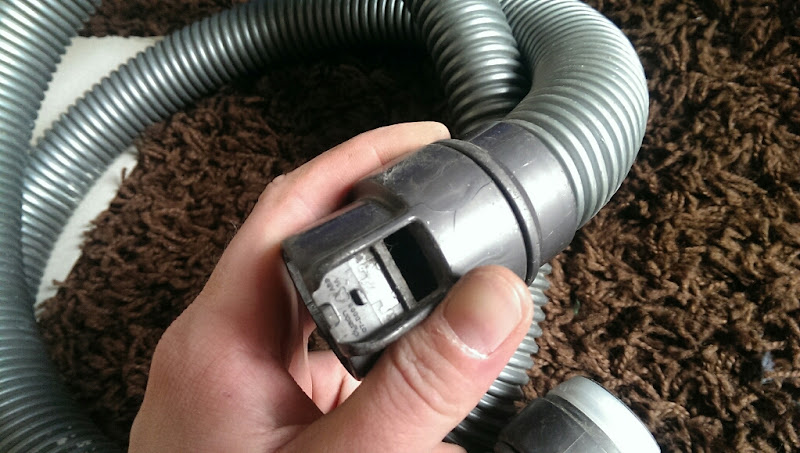
The cuff was so bad it wouldnt click on to anything


I identified that little problem straight away


The floor tool release valve was bunged up too


Of course, it needed saving, but (as we all know) there is NO information on the net about these. Spare parts are virtually non existant bar filters, so this was a bit of a dive into the unknown, with almost nothing to loose.

Almost... a fellow collector had expressed an interest with this, and a swap for a lovely Hoover Turbopower Boost. Steve, please read this before deciding, it's not in quite as good condition as I said it was after 3 pints of stella4...  :boggleeye:

So, with almost nothing to loose, here we go!


Couldn't really do much with the floor tool, so it got washed whole


Hose end next


The top cap pops off


and doesnt come off any more! I tried almost to breaking point and it wouldnt budge out the other end

There was a screw


but removing it free'd up nothing so back in it went and the whole thing got washed whole
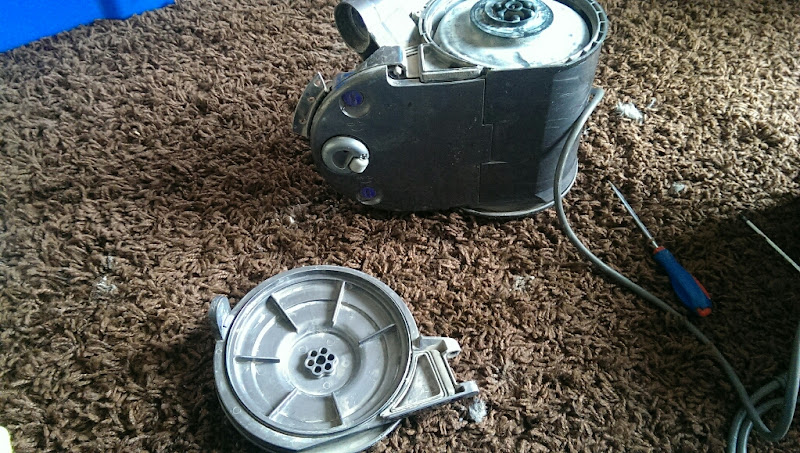


Cyclone off


The hose is a bit deformed along it's length, has been walked over alot. It also doesnt come off easily...


Remove these three TINY screws

and the holder seperates and can be removed. The hose then pulls out of the machine


Delightful


Tools end is battered


red cap removed again


Onto the machine itself now


The housing pops off the pivot points


The inner holding ring is VERY difficult to get off, sounded like it was seriously breaking but didnt. Wheel then falls off


Filter release catch removed


Other wheel now


Was only a little bit dirty
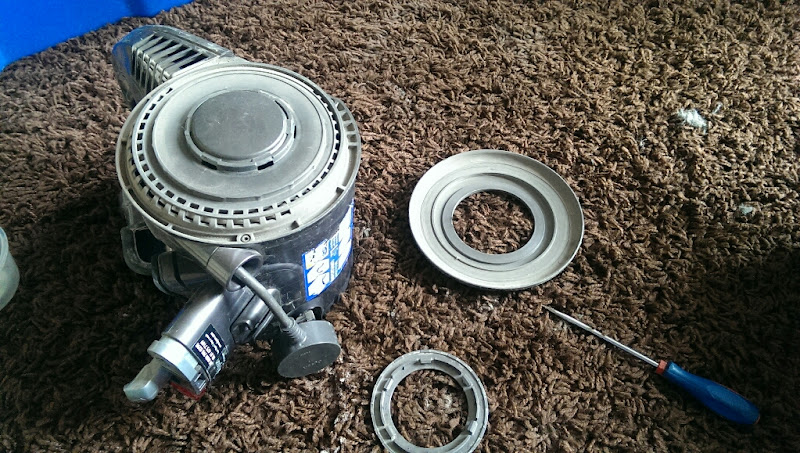


Filter housing


Sadly, whilst untwisting the caps, one snapped  >:(


I swore a bit then carried on

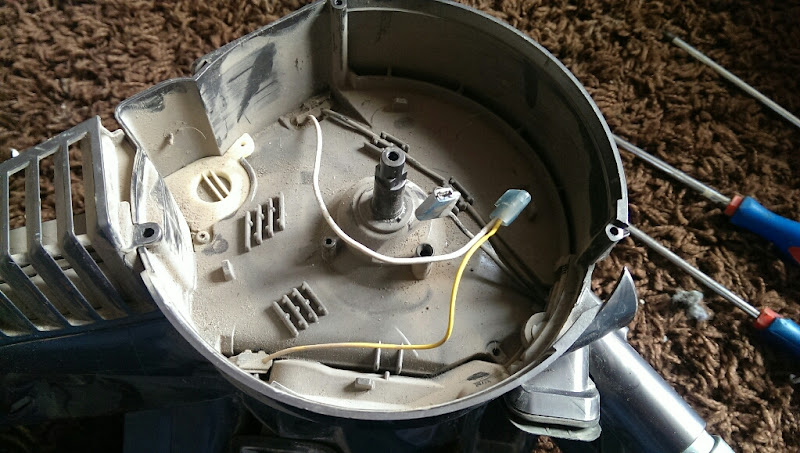
Undo the screws holding the cord rewind cover on


I did the following in completely the wrong order as it turns out. What seems the correct way is:
Undo the screw
carefully withdraw the whole unit (cord wound up, so the springs not as tensioned)
leave it the f  :censored: k alone!

Mine wouldnt budge, layers of crud had stuck it all together, so I approached it slightly differently

I unwound the cable (mistake n.1), and prised the locking tabs off to remove this


I then lifted the springs out, and they nearly took my head off


 :censored:


Amazingly, they seemed to wind up ok


The clear plastic cap holds the rewind to the machine, so with that off the reel lifts out


it runs on these contact rings like a Numatic reel does


Happy 5th Birthday Dyson...In need of a full rebuild already...


This cap prises off and reveals the cord connections


which simply unplugs


One layer out


5 even TINIER screws and the cord reel back lifts out


and unplugs from the machine


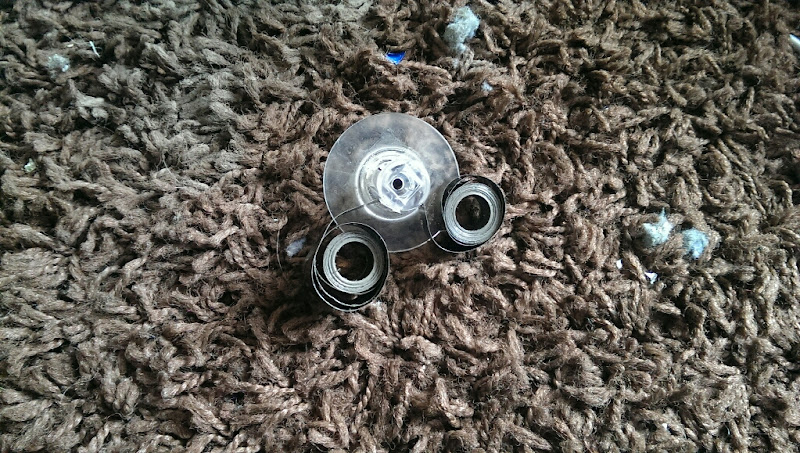
The contact rings pop off the reel back


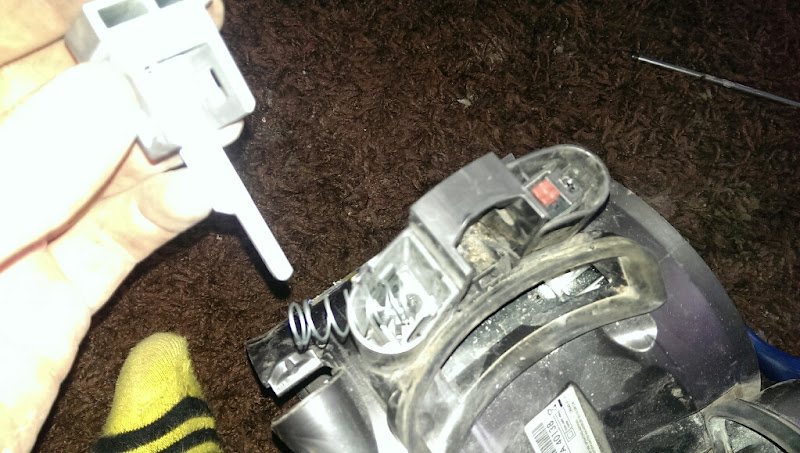
Moving onto the switch housing now. The cyclone release lever snaps out of the housing


The floor tool parking slot unscrews and snaps out of the housing


The buttons pop out from either corner


Sorry for the rubbish pics, the camera wouldnt focus...

Same for the cord rewind button


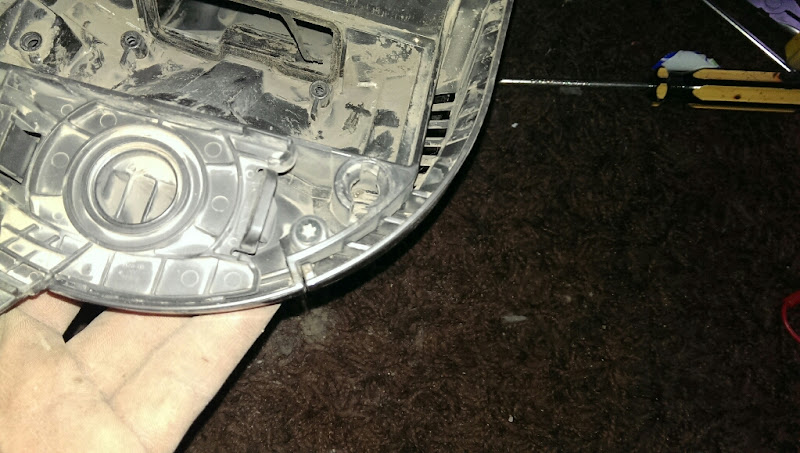
With a rather significant amount of prising and levering the housing pops up and can be removed


The switch pulls off the housing now


and the wires removed.


The switch - cord rewind can be removed completely


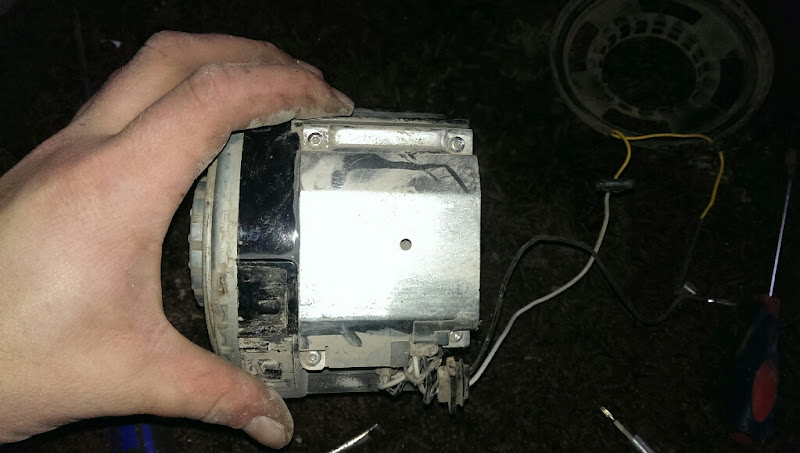
Back to the front of the machine now, and one screw on the top and one underneath release the hose input


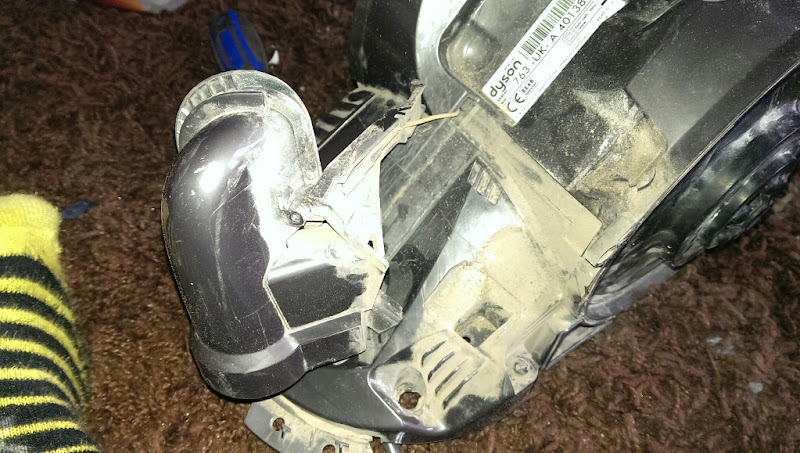
This was so covered in plaster dust the flash bounced back

The next bit is very tricky. There are no screws holding the motor housing in, just large clips. So, 2 screwdrivers and some swearing, and it popped out with a large crack, and no damage luckily. There is a rubber tube leading to the post filter area too, which needs to be poked through as it goes.


The top cover came off as well, although the clips holding it on hold the motor into the housing so they unclipped on removal


There was a metal plate on the side of the housing


Ah, a comically large (for the size of the machine) PCB


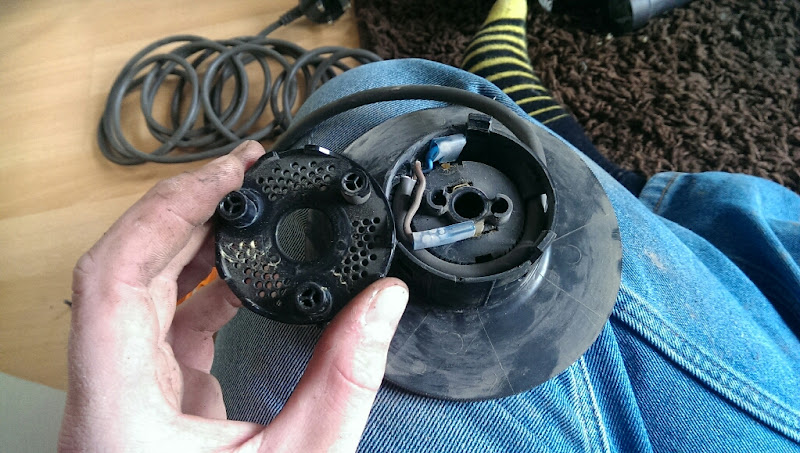
The 2 motor wires disconnect from this board


The motor can be removed from the housing now


It's a panasonic


Fancase taps off


and a nut releases the fan and 2 washers


Another washer sits under the fan


2 screws seperate the bottom fan from the motor


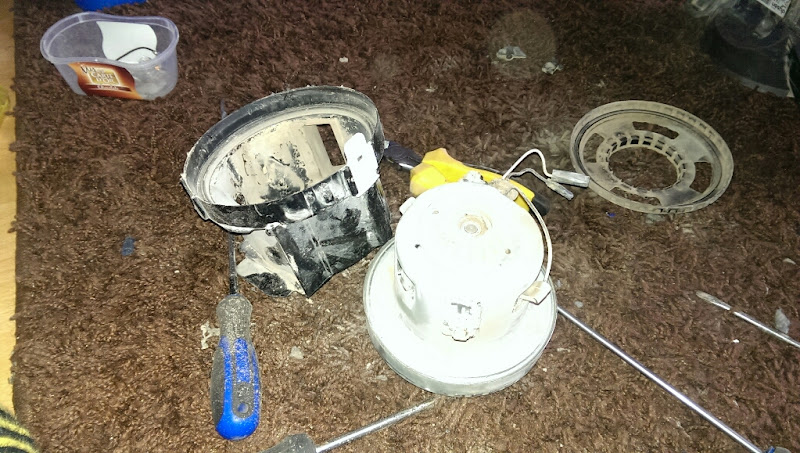
and that's it! The motor doesnt come apart anymore!


Bit emptier now


There's a screw under the front to go


and the vent and very tip peice are removed


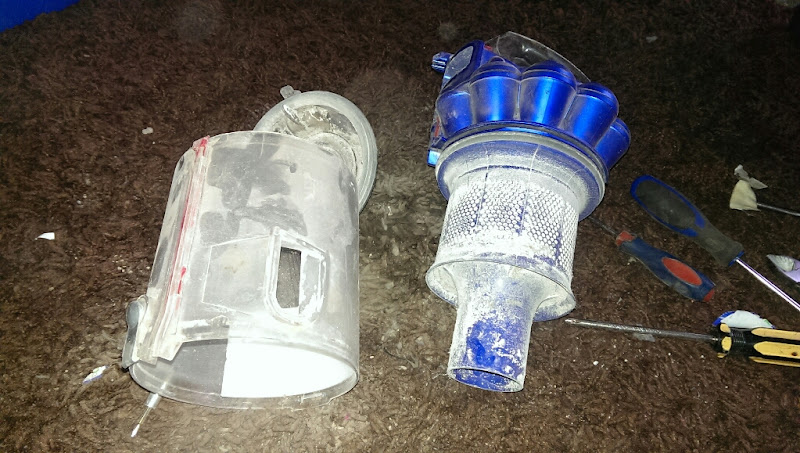
Onto the cyclone next


That's not flash glare...


Cyclone bottom flap comes off as per usual, and the outer seal pulls away


as does an inner seal


The top handle pops forward and off


Release rod pops out the top


4 screws enable the top cover to be removed


Another one holds the inner cap on


The inner seal sits below this


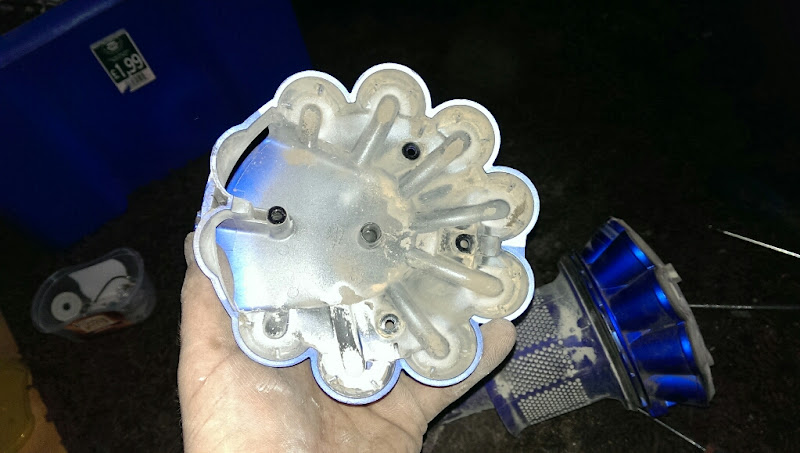
Now the inner cyclone was very interesting


Damn flash flare, I'm so sorry!


They all popped out, as did the middle 3 cones


The shroud and bottom cone seperated from the upper cyclones as they all do


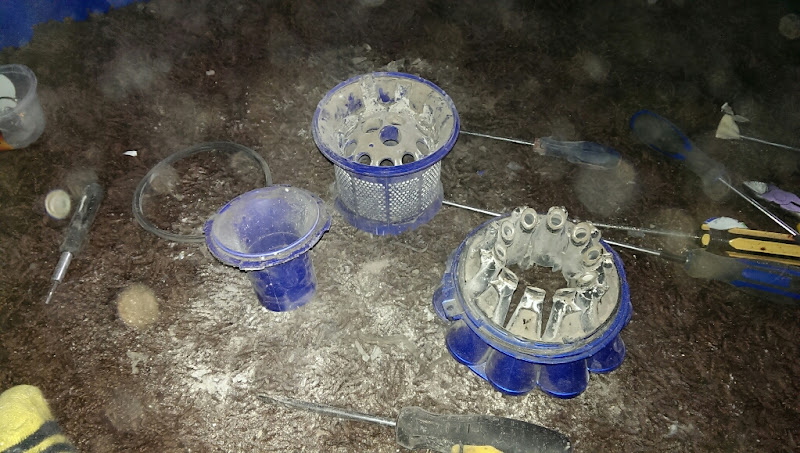
And, she was stripped down!
Collector and restorer of vintage vacuums, Dyson Appreciator! Come and see my blog, where I am uploading all my mountains of brochures, manuals and other vacuum cleaner paperwork, and also my youtube channel @beko1987!

Offline beko1987

  • Member
  • Posts: 5044
  • Country: gb
  • Gender: Male
  • Let's take it apart!
    • My blog
Re: Dyson DC26 City Stripdown, repair and Refurb
« Reply #1 on: February 18, 2015, 10:43:58 pm »
This was going to be on one post, but surprisingly I reached the 25000 character limit  :D

All the parts were washed, the hose and pre motor filter went through the washing machine with some other bits the next night. If you drank your tea watching the stripdown, you'll need another for the re-assembly!


She hasn't come up 100% I'm afraid

Shroud still had residue in the holes


but it was as clean as it will ever get so back together the cyclone went!


Upper seal back on


Sadly the shroud split when removing it, only on one side though


3 Inner cones back together


and all the removable plugs back in the correct order. The black and white ones are moulded differently, so don't fit in each others holes


Top half looks better


and the middle screw went back in, followed by the lid and those 4 screws


Top handle was a pain to get back on, both the front and the back had to go in together, at different angles... was a lot of creaking plastic...


Inner seal back in


Outer seal back on


flap back onto the bin


Some damage to the bin now visible


and the cyclone is done!


sadly very cloudy and sandblasted


Onto the main machine now. Air vent back on


Some more damage unearthed now it's clean...


hose fixing plate snapped back in


Motor next, and I popped the carbons out and cleaned them up


Cleaned the motor up as best I could


First layer on


the fan was washed, scraped and de-clogged, and went back on


and then the nut and washers


The motor is one of these


The motor went back into the slightly cleaner housing now


rubbers on


back into the housing


I cleaned the PCB and thermal fuse up


byebye


mount for the housing fits into the chassis


This bit was tricky again. I couldnt get the motor housing back inw ith the 2 rubber mounts in place, so fitted the housing, then, using some oil, slid each mount into place. The third one was a pain...


all fitted!


This little sensor sits behind the hose entry port, and was buried under dust. It feeds through the chassis and into it's mount


then clips into place


Hose port clips back on now


Motor to switch wire was clipped into place


and fed the switch to cord wire through along with it


Switch back into place


Housing back on


screws and springs in


and the pedals


and the parking slot


cyclone catch was a bit more fiddly, but snapped in eventually


Cord rewind contacts were refitted


the wires were connected up, and fed through the support brackets


I started poking about with the release valve, which I didnt think came out. Turns out it does...


so I gave it a wipe down and refitted it. Then the cord rewind backing plate screws to the chassis


The cord guide goes onto the cord

https://lh6.googleusercontent.com/-ld3H7rqpeQw/VOTco5c6pZI/AAAAAAAAikQ/dMmUFOW4llU/s800/upload_-1.jpg

The cord plugs back onto the reel


and I refitted the old re-wound springs and top cap, and screwed it down.


Then the top half of the rewind


I tried to re-tension the reel, but no matter what I tried it wouldnt do it, so I checked that the motor ran nicely, which it did, and ordered a new rewind spring assembly, which seems about the only spare stocked by anyone...

Gave up on the cord and moved on to the filter housing

Button back on


The button is pocked too sadly, this machine's been rolled a few times I think

filter housing back on


The filter washed up REALLY well


so I fitted it for now. May buy a new one if I'm feeling flush on payday and I end up liking the machine at all...


I went to bed at the point (this was tuesday night), and when I got home from work today, I carried on.

New cord rewind spring had arrived


so I pulled the old one off (moving my head first this time), wound the cord onto the reel and fitted the new spring


A quick check of the cable confirmed good, if not a bit slow operation. The reel tensions itself up when removing the cord, I had to adjust the amount of pull though as the prings nearly pinged off their supports, so left a whole loop around the support pegs.

Satisfied that it was as good as it would ever be, I refitted the housing


had to give each ring a short sharp tap with the hammer on each of the clips to fit it...


Same on t'other side


Post motor filter now, and when I initially got it, there was a seal hanging off the surround for the output, which promptly fell off completely...


so I bought a Vax 121 bucket seal strip


and trimmed it to fit, and made a lovely new seal


A new post motor HEPA filter


slight difference to the old one


Managed to get the broken clip to turn home, so for now it's not a problem. If I can afford it on pay day and the machine deserves it I'll try and obtain a new door unit. It wont be the end of the world if it wont though, since the filter is shiney new


Hose now!


which had cleaned up really really well, and after some cif and microfibre action on the outside all the paint was gone.

Refitted the release catch


refitted the hose


fitted the handle


and she was finally done!


Eva tried it out when we were done, and her face says it all, it's not a brilliant performer tbh!


It doesnt feel like 1300w of suction, the floor tool feels like theres no suction at all on carpet, yet it glues itself to the lino in the kitchen. I don't think there's any air leakage on the machine, as when I block the hose off the release valve opens fine. Will remove the pre motor filter and see if it's killing airflow anywhere...

Had a quick play anyway!


Sounds a bit screamy, but after the battering the motor has taken already, I'm amazed it still runs at all...

Few more bits to do, and I'll investigate the seemingly poor suction too, it just doesnt seem as sharp as a 1300w motor should, My Hoover 417g is comparable, the Hitachi Powerhouse CV70D has sharper suction...

Hey ho, it's been fun to do!
Collector and restorer of vintage vacuums, Dyson Appreciator! Come and see my blog, where I am uploading all my mountains of brochures, manuals and other vacuum cleaner paperwork, and also my youtube channel @beko1987!

Online MVacs

  • Administrator
  • Member
  • *****
  • Posts: 6383
  • Country: gb
  • Gender: Male
    • Manchester Vacs - The Independent Dyson Specialists
Re: Dyson DC26 City Stripdown, repair and Refurb
« Reply #2 on: February 18, 2015, 11:53:40 pm »
Awesome strip down guide and photos!  :bow:

I have one of those 915219-03 HEPA filters on my desk at home to put on our site when I get around to it.

Edit: Now on the shop >>here<<

Offline beko1987

  • Member
  • Posts: 5044
  • Country: gb
  • Gender: Male
  • Let's take it apart!
    • My blog
Re: Dyson DC26 City Stripdown, repair and Refurb
« Reply #3 on: February 19, 2015, 08:20:30 am »
I did check your sale page, but couldnt find any.

I went to move it this morning and the floro brush got caught in the parking slot, and the whole machine picked up too. Sod it, saved me bending over! It really is a tiny machine. Funky, but not terribly practical. Due to my height, when I use it and pull it about the front end lifts up and it comes over on it's rear wheels...
Collector and restorer of vintage vacuums, Dyson Appreciator! Come and see my blog, where I am uploading all my mountains of brochures, manuals and other vacuum cleaner paperwork, and also my youtube channel @beko1987!

Offline beko1987

  • Member
  • Posts: 5044
  • Country: gb
  • Gender: Male
  • Let's take it apart!
    • My blog
Re: Dyson DC26 City Stripdown, repair and Refurb
« Reply #4 on: February 20, 2015, 08:41:11 am »
Mmmmm, I thought somethign was amiss but I don't think it is...

In use, there's a loud howling from the machine. At first, I thought it was just the motor being a bit knackered, but if I remove the cyclone the noise stops and the motor sounds lovely!

Intregued, I stripped the cyclone apart again just to check. All was well...
Opening the pre motor filter cover stops the noise
Removing the filter and closing the door again and the noise re-appears

Could it just me that the sirflow paths are so tight on this machine that the airflow is causing the howling noise somewhere? There's no leakage, the noise doesn't stop if I squeeze the machine whilst running.

Anyone else got a DC26 who could confirm or deny there is an odd noise with the cyclone in place and that the noise stops when it or the pre motor filter cover is removed?
Collector and restorer of vintage vacuums, Dyson Appreciator! Come and see my blog, where I am uploading all my mountains of brochures, manuals and other vacuum cleaner paperwork, and also my youtube channel @beko1987!

Offline dragoncurt

  • Member
  • Posts: 162
  • Country: gb
  • Gender: Male
  • Dyson FTW !
Re: Dyson DC26 City Stripdown, repair and Refurb
« Reply #5 on: January 24, 2018, 07:04:29 pm »
Hi, just got one of these today and I've read the part when you said the hand pops off from the cyclone but I'm not able to do that. Do you mean the back where the red bin label is or the front where it shows Dyson. Thanks

Offline leoyang123

  • Member
  • Posts: 1
Re: Dyson DC26 City Stripdown, repair and Refurb
« Reply #6 on: February 06, 2022, 10:51:28 am »
Hi Beko:
   Tks for your Awesome strip down guide.
   Can you teach me how to remove top handle from DC26?
Tks
Leo


Dyson Cylinder Spare Parts


Trade Dyson Spare Parts


Dyson Spare Parts


Freestanding Dyson Cordless Vacuum Stand


Buy a Dyson DC04 Wand Handle


Buy a police truncheon


Instagram

Dyson Spares, Parts, Advice   Follow us on Twitter

Manchester Vacs on Instagram

Registration