The World's #1 Vacuum Cleaner Advice, Repair, Discussion & Information Forum

Author Topic: Hoover 262 - Stripdown and Refurb  (Read 15589 times)

Offline beko1987

  • Member
  • Posts: 5044
  • Country: gb
  • Gender: Male
  • Let's take it apart!
    • My blog
Hoover 262 - Stripdown and Refurb
« on: February 07, 2016, 07:25:48 pm »
I've had this for years! I found it on ebay 5 minutes from work and bought it! When I first got it, it didn't run so well

The pictures start in 2013


Dust


It was clean underneath


Ah


Pure filth underneath the hood


The original cable was perished from the handle bail to the motor


so I removed it


I replaced the wires, and refitted the old shielding


Removed the motor


It slowed down when using it I seem to remember
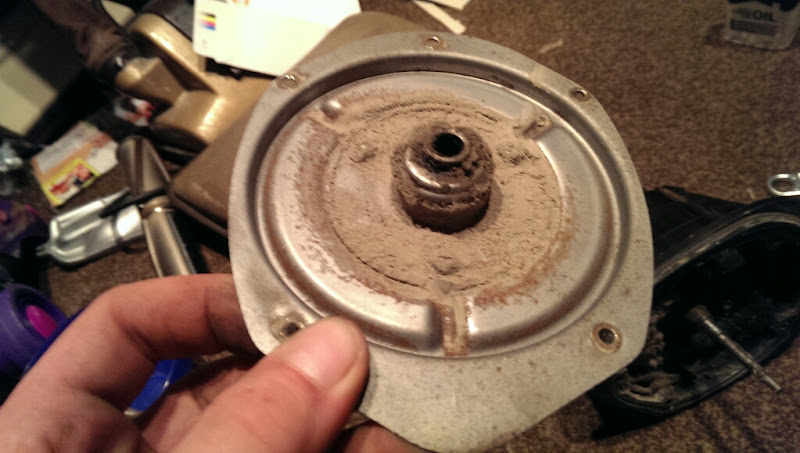


Fan off


Fancase bearing was looking grubby


Coil and Armature even more so!


Some wiring reference shot


Rubbish picture, but the coil was under a thick layer of greasy dirt. I was amazed it ran at all...

Cleaned that off


Cleaned the motor housing out a bit


refitted the coil


and the armature


The carbon brushes are a bit worn though. No more pictures from the past, I put it all back together and it ran well, then I just forgot about it for the last few years.

Until last week!!

When I got it down from the loft! I forgot to mention it had all the original tools and tool holder and airtight hose!


I started on the tools


A small oblong dusting brush


A small round dusting brush


A long wooden wall/floor brush


Crevice tool


Blowing adaptor


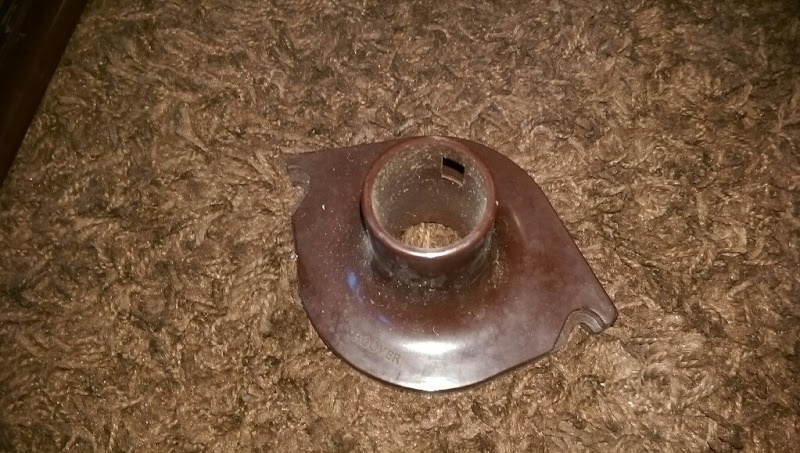
This is the adaptor that connects to the machine


The adaptor can be taken off the end of the hose


The cardboard holder is immaculate as well


Extension tube and bent end


and hose


I cleaned the tool caddy off


which made it quite damp but it dried out very quickly


I got some tools out


and started unscrewing the brushes


Dusting brush


Lovely detail on the bakelite


The larger dusting brush does the same thing


and finally the larger, wooden brush


And the tools were disassembled


Onto the machine itself now


Bag removed from the top hook


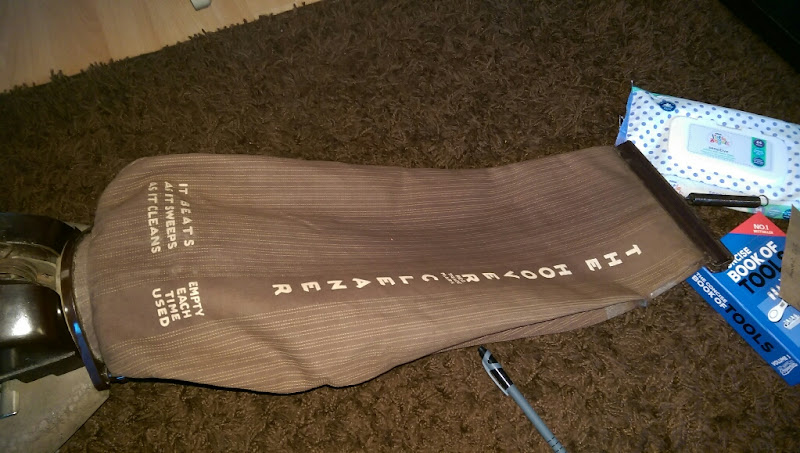
The bag (and blower attachment) is held on with 2 thumb screws


It's been a few years since I cleaned the bag out


Sadly the bolt that holds the bag onto the collar is rounded full off


I left it alone. Couldnt cut a new screwdriver slot as I would cut the bag, much pressure with the screwdriver as was either rounded it off a bit more, or slipped off towards the bag...

I left it alone and went back to the top of the handle


Switch housing screws removed


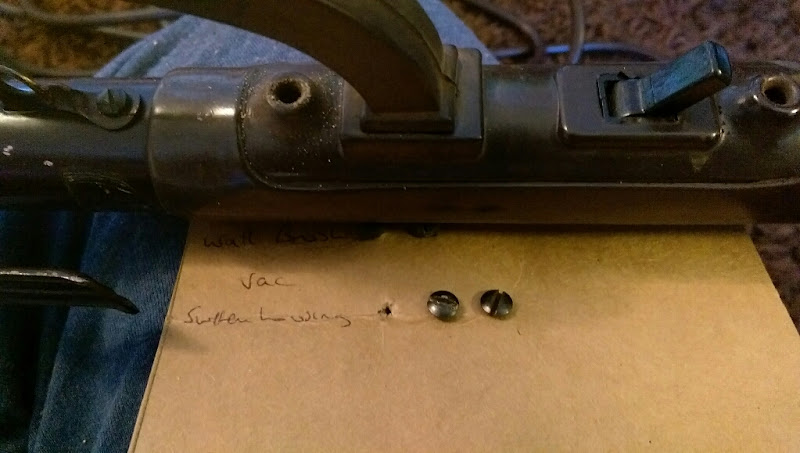
and the cover is removed


Switch wiring reference shot


The paint put on by Hoover to denote something is still present


The mains cable earths to the handle behind the switch


The top bag hook is held in by a screw


and lifts out once the screw is removed


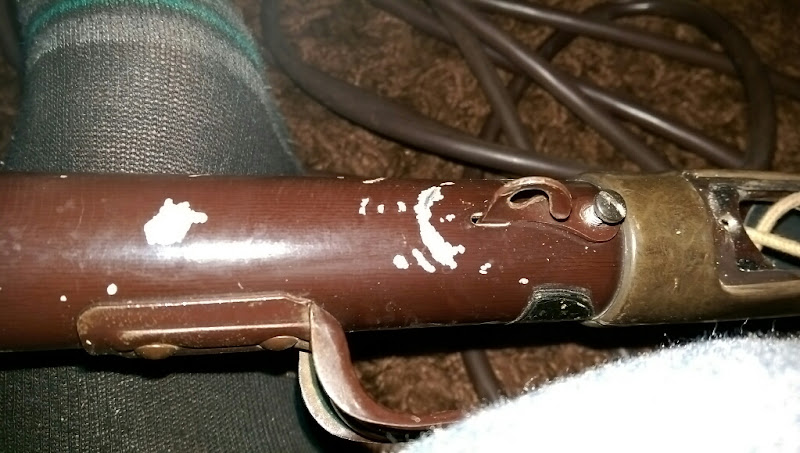
The handle is held in with the usual Hoover bolt at the bottom


I do like this design, no having to remove cables to remove the handle like the junior/senior


To remove the plug, a fibre pin has to be tapped out


The plug and handle cables can be withdrawn. Thankfully the wires are immaculate so don't need replacing


It's seen a Hoover service at some point in its past too. I removed the sticker as it was pretty much gone anyway


Getting there now! (joking, another 115 pictures to go...)


I found the serial number stamp

https://lh3.googleusercontent.com/-irxM0R_CFKo/VqUlhcXQdwI/AAAAAAAAxKU/BsrJY9B1po8/s800-Ic42/upload_-1.jpg

and removed the baseplate


Agitator out


brushroll end caps off


Yummy


The brushroll bearings were  :dead-dyson:


fished out the wobble washers


and the same on the other side


With some considerable fiddling the brushroll end caps came out and the brushroll was sick everywhere


The brush strips were knackered too, they had gone very soft and sparse


Back to the machine, the rear wheels are held in place with this bolt


The whole thing is sprung, as it is part of the mechanism that locks the tool adapter in place. A dyson brushroll axle came in handy to tap the axle out


Once removed,  the wheels came off


and the springs and bracket for the aformentioned tool adapter fall off too


Onto the tool adapter chute now


It has a little flap that does a shit job of keeping the suction to the floor when the tools are not in use, held in with a small spring


I did try to remove the front wheels but just could not get the circlips off, and realised that even if I did get them off, I may not get them back on again


Underneath done, the hood can come off


revealing the motor


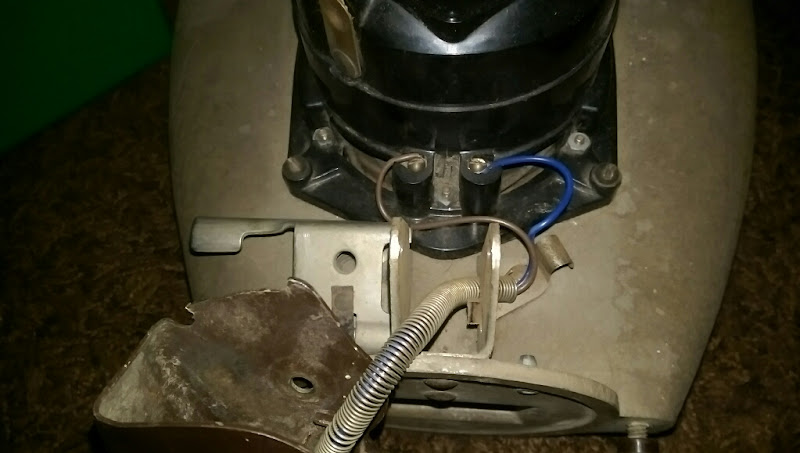
The yolk to motor wire runs through the bottom of the handle


There is a slight interlude now for the tools, which were dry and could be polished


Back to the machine, and the metal brackets that form something to do with the dirtfinder can be removed from the hood


The bolt holding the handle bail together can be removed


The socket is held in with a screw


and the handle can be withdrawn, and the wiring disconnected


The spring that keeps the handle sprung falls out at some point around here too


Quick shot of how the wiring attaches to the socket inside the handle


and the handle bail is removed and stripped


The handle release pedal is held in place with a small bar which is easily tapped out


I started taking the bag holder bolts out, but only one side could be removed


The other side is blocked in with the chassis moulding, and I could get a spanner to it but not turn it, so I left it be!

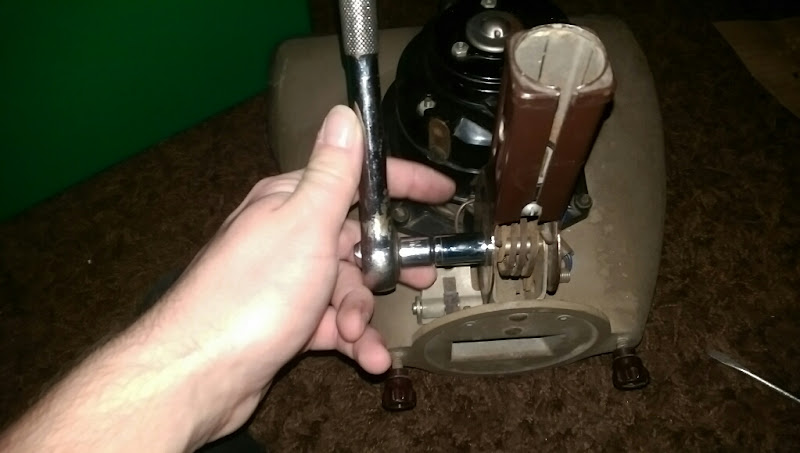
The motor is next, and I took it apart out of sequence, only having a brainwave when re-assembling it so ignore these pictures for now, I took better ones on re-assembly...

4 screws release the motor, and the belt spindle has to come off first


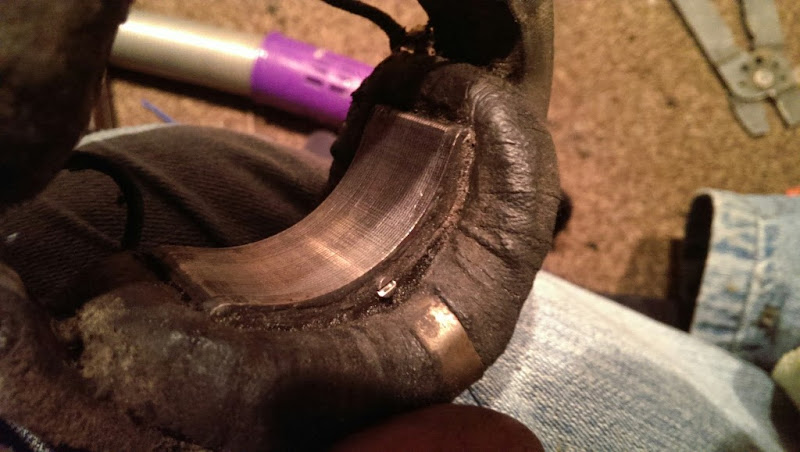
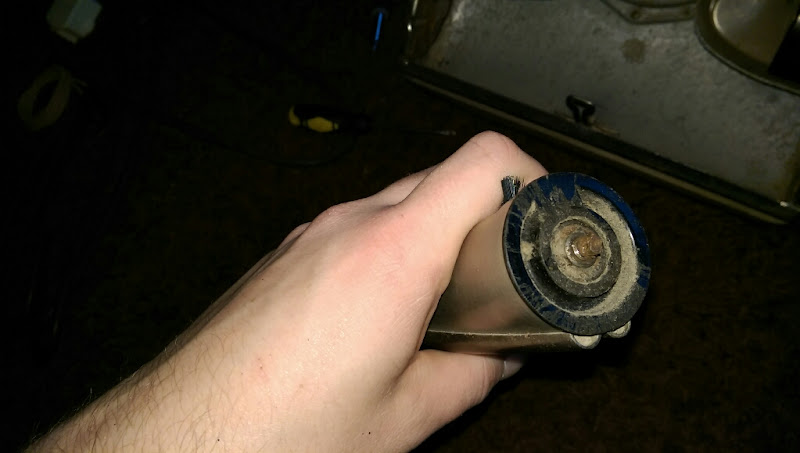
Then the fan can be lifted off


revealing the fancase bearing


tiny carbons out at this stage


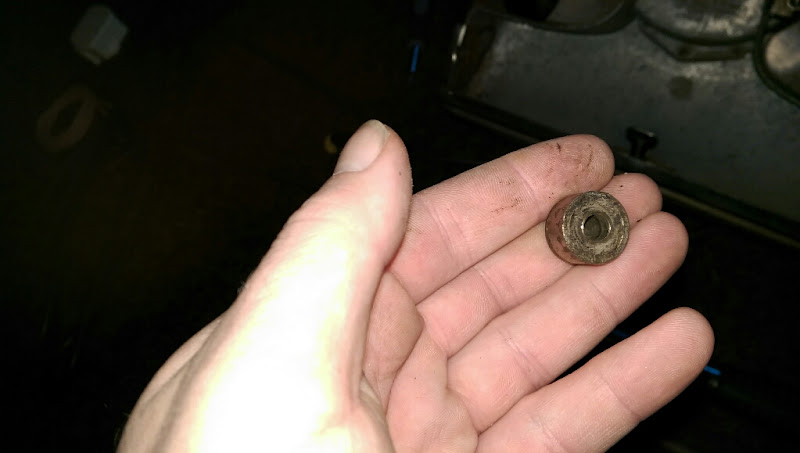
I took the bearing out first, which was a bit stupid as the nuts fell into the motor...


Then the bearing holder (which I should have done first...)


Motor wiring removed


(again, what should have been the second step) is to unscrew the top cover of the motor


The small fan that cools the bulb unscrews next, then the armature can be withdrawn. The coil needs its connections unscrewing now


Then the brush holders removed


and she is stripped!
Collector and restorer of vintage vacuums, Dyson Appreciator! Come and see my blog, where I am uploading all my mountains of brochures, manuals and other vacuum cleaner paperwork, and also my youtube channel @beko1987!


Offline beko1987

  • Member
  • Posts: 5044
  • Country: gb
  • Gender: Male
  • Let's take it apart!
    • My blog
Re: Hoover 262 - Stripdown and Refurb
« Reply #1 on: February 07, 2016, 07:26:00 pm »
Whilst I washed, dried and polished it, a fellow collector sold me 2 new bulbs and some new, much stiffer brushes


The hood also polished up really really well!Nearly 80 years of muck just vanished


And it's on to the motor re-assembly, done in the correct order this time!

Brush guides back in


Whilst trying to refit the coil, I noticed that one side of it had the connector broken off, so wasn't actually connected to the carbon brushes one side at all... still ran fine though!


A new ring terminal crimped and heatshrunk on soon had that sorted, and the coil could be fitted


I re-did the terminal on the other side too as it was looking a bit thin


That done, it's time to build the armature up. Fit the bearing to the holder, and fit that to the armature


Then drop the fan spacers and fan onto that


and fit the belt pulley (could do with a new one of these for it too, it's a bit worn)


Drop the assembled armature into the motor, screw the little cooling fan onto the top and fit and screw down the top bearing, and fit the carbon brushes


The motor can be refitted to the machine now. There was a rubber seal originally, but this fell apart when I removed it so I fitted the motor back after running a nice bead of black sealent around it, which will do a much better job than the old rubber seal anyway

Quick test before I sealed it down


Lovely!


The release pedal can be refitted now


I tidied up the motor wires with some solder


and fitted that and the handle bail back together


Re-fitted the bag holding bolt I removed


Refitted all the springs and rear axle (which isnt actually too bad as the springs hold themselves in whilst you fiddle with the axle)


Lashings of grease was used with that bit too to smooth it out

I did a stage 1 polish on the hood, still need to get the machine polisher on it


and moved onto the handle, re-fitting the wiring


Brushroll now


Swapped the rubber feet from the old brushes to the new ones


Sadly the new brushes are not genuine, but the fact that they actually contribute to the 'It Beats, as it Sweeps, as it Cleans' action now, I wont hold it against them!


fitted


2 shiney new brushroll bearings were procured


but it was too late to tap the end caps in to fit it all together by this point, so I put the metal bracket into the hood


and got a bulb out


Not being a qualified person in anything, I ignored it's advice and fitted it anyway


and with that, the hood can go back on


as can the bag


and she looks like a Hoover again


Sadly the bag does have a bit of damage, which has been made worse by someone covering it in gaffa tape at some time in the 1980's


and there is some wear at the top where the bag slide goes


but, it still looks bloody nice! Daylight came at the weekend, so I could tap the brushroll end caps home, and fit the brushroll


Sadly one of the end caps doesn't fit 100% correctly, but the brushroll is still balanced and silent

Baseplate back on


The handle needs re painting, which I would like to have a crack at when the weather improves, as I would be a single man if I attempted to do that in the front room


I then had a good play


and gummed the crap out of it, all the hair wrapped around the brushroll and forced the belt off, slowing the motor. I paused the video to sort it out, but my phone went into stand by and stopped the video, so I had to make a part 2, and stuck to some nice easy dust which really shows the agitation off


This meant that I had to clean the bag


The micro hose for the Miele was excellent for it


50/50


Eva modelled it for me once it was clean


There was one final job to do though. Ever since I took it apart the first time, I forgot to refit the bolt that holds the tool adapter clamp on. I found it in the shed


and fitted it


This meant I could have a go with the tools, which are laughable tbh but the hose is airtight after checking on the miele


and for now, she is done! Need to paint the handle at some point in the summer and job jobbed! I'm really pleased with how it turned out. Now I just need a bojack bag so I can use her a bit, don't want to keep making the original bag dirty...
Collector and restorer of vintage vacuums, Dyson Appreciator! Come and see my blog, where I am uploading all my mountains of brochures, manuals and other vacuum cleaner paperwork, and also my youtube channel @beko1987!

Offline RustySkull

  • Member
  • Posts: 1555
  • Country: england
  • Gender: Male
  • Kirby, Royal, Sebo =)
    • RustySkull Productions YouTube
Re: Hoover 262 - Stripdown and Refurb
« Reply #2 on: February 07, 2016, 09:33:05 pm »
Blimey, long thread, nice job though ;)
If You Like Machines, Radios and Cars As Well As Vacuum Cleaners Then Check Out The Official RustySkull Productions YouTube!
>>>>>>RustySkull Productions YouTube!<<<<<< >>>>>Twitter<<<<<>>>>>Instagram<<<<<

Offline beko1987

  • Member
  • Posts: 5044
  • Country: gb
  • Gender: Male
  • Let's take it apart!
    • My blog
Re: Hoover 262 - Stripdown and Refurb
« Reply #3 on: February 07, 2016, 09:42:29 pm »
long? that wasnt a long thread!

thanks though.  need to watch your kirby videos tomorrow
Collector and restorer of vintage vacuums, Dyson Appreciator! Come and see my blog, where I am uploading all my mountains of brochures, manuals and other vacuum cleaner paperwork, and also my youtube channel @beko1987!


Online MVacs

  • Administrator
  • Member
  • *****
  • Posts: 6383
  • Country: gb
  • Gender: Male
    • Manchester Vacs - The Independent Dyson Specialists
Re: Hoover 262 - Stripdown and Refurb
« Reply #4 on: February 08, 2016, 01:24:41 am »
Nice pen in one of those photos.  ;D

Yes, that handle needs painting and the missing front lense needs finding.

But nice machine. And a thorough job as always.  :thumbsup:

Offline beko1987

  • Member
  • Posts: 5044
  • Country: gb
  • Gender: Male
  • Let's take it apart!
    • My blog
Re: Hoover 262 - Stripdown and Refurb
« Reply #5 on: February 08, 2016, 06:42:11 am »
ah,  theres no missing front lens,  it didnt have one full stop! this is  a pre war design,  inface this is one of the models that got caught up when production stopped.  This example is post war,  due to the mottled balekite hood or summat, pre war ones were solid colour.

But its not designed to have a bulb lens.  The way the motor cools the bulb is quite cool though
Collector and restorer of vintage vacuums, Dyson Appreciator! Come and see my blog, where I am uploading all my mountains of brochures, manuals and other vacuum cleaner paperwork, and also my youtube channel @beko1987!

Offline Madrat

  • Member
  • Posts: 2923
  • Country: england
  • Gender: Male
Re: Hoover 262 - Stripdown and Refurb
« Reply #6 on: February 08, 2016, 10:44:12 am »
Very nice, I just love the design, reminds me of something from a black and white sifi movie.  I really want one, as much as I want a Hoover Starlight.

Offline beko1987

  • Member
  • Posts: 5044
  • Country: gb
  • Gender: Male
  • Let's take it apart!
    • My blog
Re: Hoover 262 - Stripdown and Refurb
« Reply #7 on: February 08, 2016, 11:04:44 am »
I got lucky with mine, happened upon it on ebay as so many ace finds are!
Collector and restorer of vintage vacuums, Dyson Appreciator! Come and see my blog, where I am uploading all my mountains of brochures, manuals and other vacuum cleaner paperwork, and also my youtube channel @beko1987!

Online MVacs

  • Administrator
  • Member
  • *****
  • Posts: 6383
  • Country: gb
  • Gender: Male
    • Manchester Vacs - The Independent Dyson Specialists
Re: Hoover 262 - Stripdown and Refurb
« Reply #8 on: February 08, 2016, 05:20:31 pm »
You will be wanting this then.

ila_rendered

Offline beko1987

  • Member
  • Posts: 5044
  • Country: gb
  • Gender: Male
  • Let's take it apart!
    • My blog
Re: Hoover 262 - Stripdown and Refurb
« Reply #9 on: February 08, 2016, 06:14:07 pm »
Bootiful! How much is 22gns nowadays? What is gns? Guinea?
Collector and restorer of vintage vacuums, Dyson Appreciator! Come and see my blog, where I am uploading all my mountains of brochures, manuals and other vacuum cleaner paperwork, and also my youtube channel @beko1987!

Online MVacs

  • Administrator
  • Member
  • *****
  • Posts: 6383
  • Country: gb
  • Gender: Male
    • Manchester Vacs - The Independent Dyson Specialists
Re: Hoover 262 - Stripdown and Refurb
« Reply #10 on: February 08, 2016, 06:20:16 pm »
Bootiful! How much is 22gns nowadays? What is gns? Guinea?

A Guinea I recall from horse auctions years ago is £1.05. £23 was a lot in 1938.

Offline beko1987

  • Member
  • Posts: 5044
  • Country: gb
  • Gender: Male
  • Let's take it apart!
    • My blog
Re: Hoover 262 - Stripdown and Refurb
« Reply #11 on: February 08, 2016, 06:26:13 pm »
Wow, the closest I can get is:

In 1935, £23 0s 0d would have the same spending worth of 2005's £850.54

http://www.nationalarchives.gov.uk/currency/results.asp#mid

That's nearly a Kirby!

Wish it was worth £850 today!
Collector and restorer of vintage vacuums, Dyson Appreciator! Come and see my blog, where I am uploading all my mountains of brochures, manuals and other vacuum cleaner paperwork, and also my youtube channel @beko1987!

Online macman

  • Member
  • Posts: 333
  • Country: gb
  • Gender: Male
Re: Hoover 262 - Stripdown and Refurb
« Reply #12 on: February 09, 2016, 10:03:49 am »
Pedant's corner: one guinea was (strictly) 21 shillings.

Offline dysondc16

  • Member
  • Posts: 292
  • Country: us
  • Gender: Male
Re: Hoover 262 - Stripdown and Refurb
« Reply #13 on: February 09, 2016, 09:55:37 pm »
Wonderful refurb as usual! Very lucky to have the tools and all, most hoses from that era have long since degraded.

Poor thing, first its brush clogs then you can hear its bag clogging in the second video! May not be the best for a daily driver...

Offline beko1987

  • Member
  • Posts: 5044
  • Country: gb
  • Gender: Male
  • Let's take it apart!
    • My blog
Re: Hoover 262 - Stripdown and Refurb
« Reply #14 on: February 09, 2016, 11:35:02 pm »
I dunno,  most machines of its type dont like big clumps of your girlfriends hair,  it all went under the belt and lifted it up and threw it off the spindle!

I have had a plan for the bag,  its a bit heath robinson but it may just work! Shes back up in the loft for now though to stop Eva playing with it,  so it can wait for another day!
Collector and restorer of vintage vacuums, Dyson Appreciator! Come and see my blog, where I am uploading all my mountains of brochures, manuals and other vacuum cleaner paperwork, and also my youtube channel @beko1987!


Trade Dyson Spare Parts


Dyson Spare Parts


Freestanding Dyson Cordless Vacuum Stand


Buy a Dyson DC04 Wand Handle


Buy a police truncheon


Instagram

Dyson Spares, Parts, Advice   Follow us on Twitter

Manchester Vacs on Instagram

Registration