The World's #1 Vacuum Cleaner Advice, Repair, Discussion & Information Forum

Author Topic: Dyson DC04i - Stripdown and Refurb  (Read 12387 times)

Offline beko1987

  • Member
  • Posts: 5044
  • Country: gb
  • Gender: Male
  • Let's take it apart!
    • My blog
Dyson DC04i - Stripdown and Refurb
« on: August 04, 2015, 11:57:31 am »
A few months ago, one of our team managers mentioned that her dyson hose had broken, so she bought a new one... :'(
Fast forward to last thursday, and she told me it was in the back of her car. When she left, I popped with her and grabbed it

Older Dysons came in 2 flavours, Clutched, and Non Clutched.

Non clutched looks like this


And clutched models look like this


If you have a clutch in front of you, you want this thread: https://manchestervacs.co.uk/DysonForum/index.php/topic,1553.0.html

Anyway, I bought this dyson into the office as I had an hour left (everyones used to me and vacuum cleaners so not an eyelid was batted...)


and took it home


It was surprisingly non faded! Tayyab tells me it's a later one, due to the lack of stickers on the cyclone, the lime green handle top, lack of wand cap spring and that the plastics are different being a later one so no fading like the earlier models!


Cyclone off first, and put to one side


Cord off


Wand off


Ah yea, forgot about the broken hose


Had a crevice tool


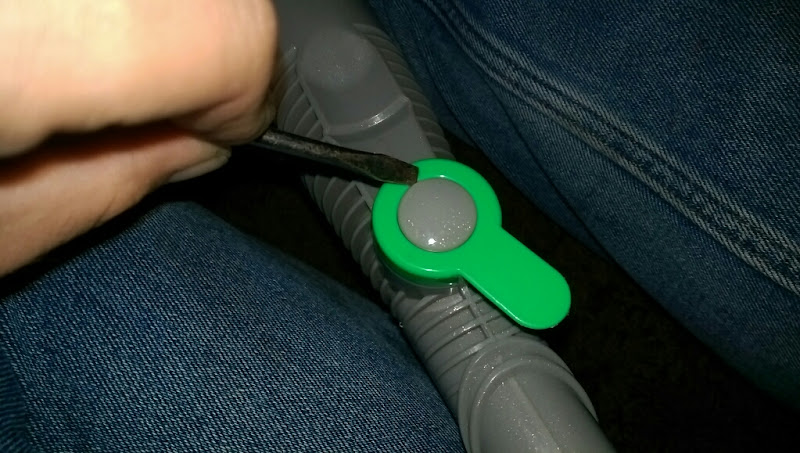
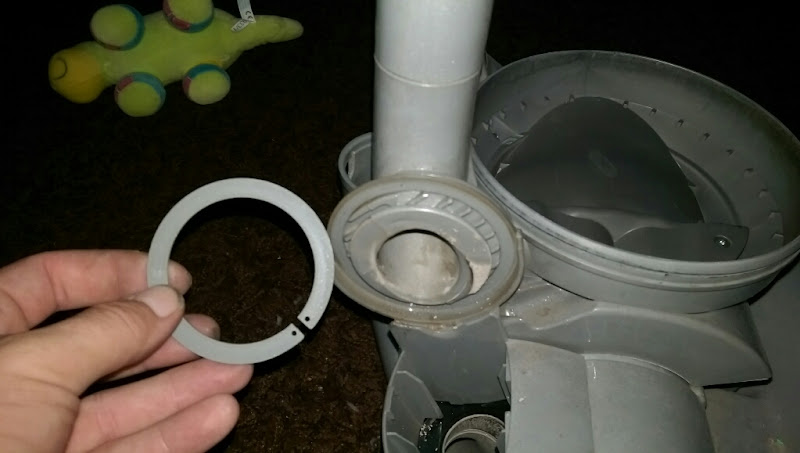
To remove the hose, grab your trusty flatblade, and push in and up on this tab


Which will pop the hose out


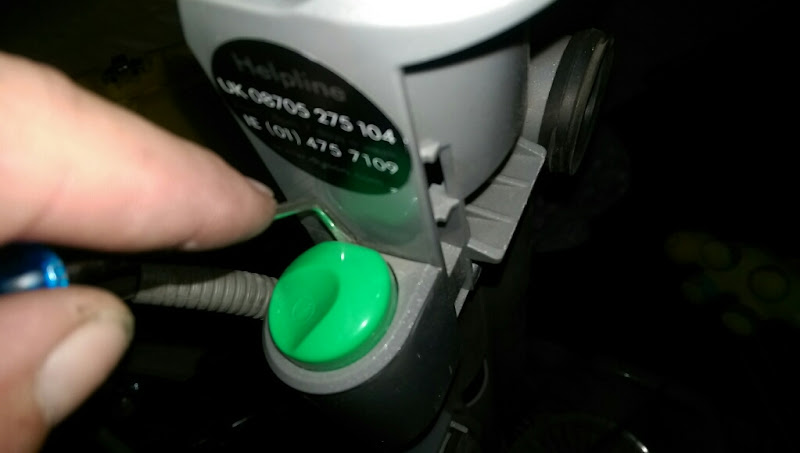
Now you can remove the hose, and in my case, sling it in the bin. Put to one side, or run it through the washing machine on a long hot wash with a few towels and the washable filter that sits in the top of the cyclone.

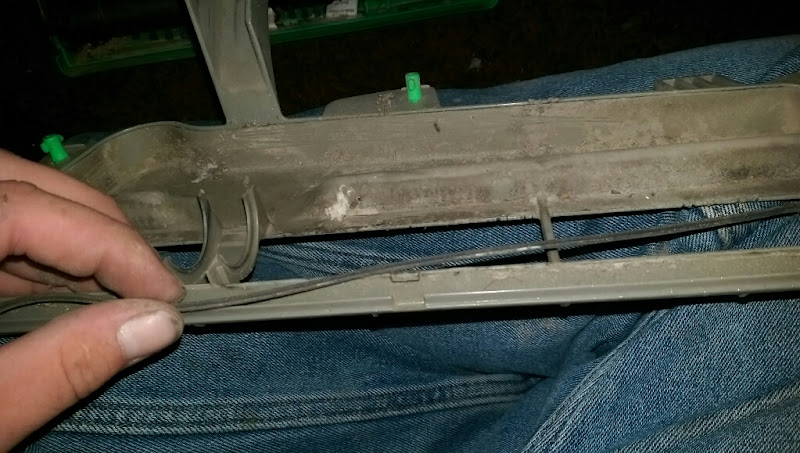
Onto the wand. The wand cap pulls off from one side then falls off


On most other DC04's there is a metal spring here that clips into 2 tiny holes either side of the wand. Remove this if you have it

Around to the front, and lever off one side of the wand release button


and remove it


Pop the spring to one side.

This next bit I almost advise you DO NOT DO, as the risk of borkage is high, and these wand caps are blummin expensive and rare now... but it does lever out from the back


and then lifts off from the front (dont pull it off)

Again, not really needed but I'll cover it for completeness, if you pop this cap off the top cord hook


and undo the large torx screw that sits under the lithium grease


You get the top cord hook off


This photo came out blurry which was a shame but the wand is now complete!


Next, you need to obtain a lovely DC04 Switch removal tool (https://manchestervacs.co.uk/Dyson/DC04-spares.html/DC04-switch-removal-tool


It can be a b :censored:d, not gonna lie, but it will come out!

You can now remove the screw holding the switch assembly in place


and the switch assembly lifts out


You could strip this part out as well, but they do break easily when removing the switch so I never do anymore. All you need to do is disconnect the neutral wire


Then remove the one live connector from the switch


Unclip the wires from the switch housing


and you should be free

Cable off!


You will need to remove the spade terminal cover off the live wire (no idea why the neutral is showing, sorry!) to get the spine cable out. It does pop out by inserting the switch removal driver into the back of the connector and levering up the locking tab, it locks on the non flat side of the terminal.


Remove the chassis seals


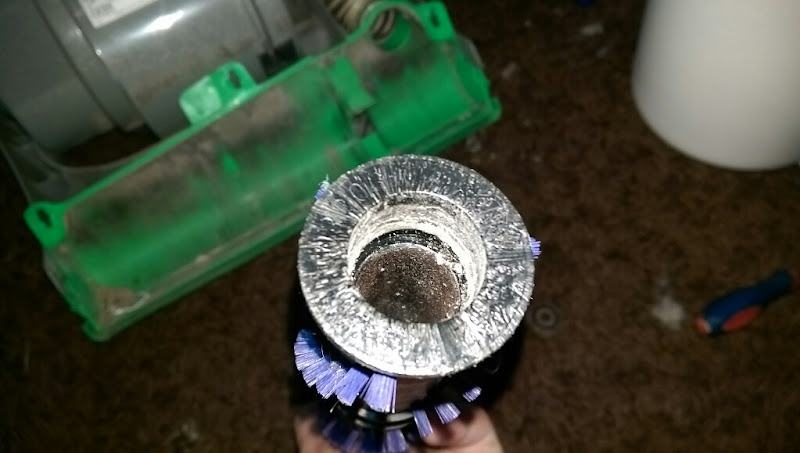
Moving down the machine, pop the post motor filter cover off using the handy lug for just this purpose!


This allows access to the post motor filter


Which really SHOULD NOT be this black!


Next up is the LH Blockage removal assembly. Squeeze both tabs in


and out it comes


To remove the lower part, you hold it like so, the opposite sides to the locking tabs


then squeeze and pull and it will distort away from the tabs and pull off


This then allows you to strip it down as so, the rubber seal pulls off the end of the lower housing


Remove the chassis seal


The seal is held on by a big plastic circlip


This pulls off


Moving underneath the machine, remove the lower blockage removal assembly (this unblocks the wand if you block it via the hose...)


A quick twist of the green part removes it from the u bend if you are being anal about it...

Next is the base plate, and you need to have the machine in this position to start with


because once the locking tabs are undone the base plate comes away like so, and clearance is needed


The base plate lifts away now


There are 2 seals on the baseplate. They may be quite fragile nowadays, and you must not loose them. They do lift out if needed, or can stay in and not harm anyone.


Remove the blockage if you spot one


You will now see the belt winking at you. Pop it off the motor spindle with a screwdriver or your finger


The brushroll lifts out of the housing now


The end caps can be removed now. If you hold both ends and twist/pull, one end will come off. Withdraw the axle and remaining end cap, hold the axle in a vice/molegrips and twist the other end cap off


The bearings sit inside the brushroll


Insert the axle just into the bearing enough so it doesnt come too far out the other side and lever


Damn flash flare, sorry


And out


This brushroll has the common wear on one side, with the other side fine


You could look at replacing it (https://manchestervacs.co.uk/Dyson/DC04-spares.html/brushroll-non-clutch-dc04-dc07-dc14) but it does sound fine when back together, with no vibrations, and the overall brushroll is good. You'll have to make the call.

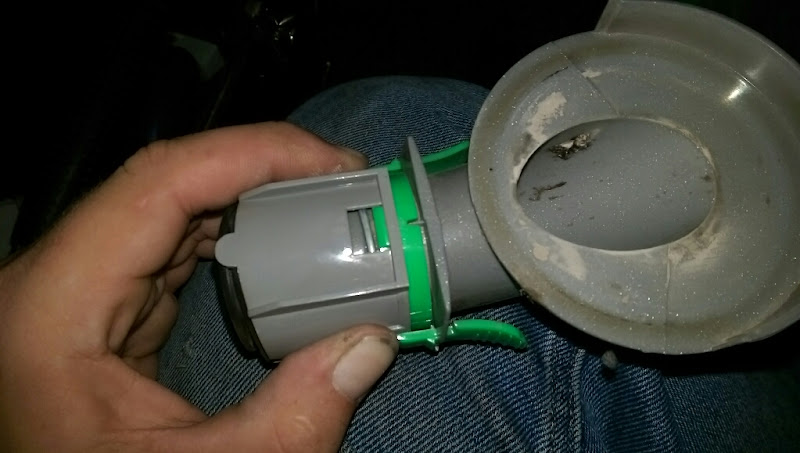
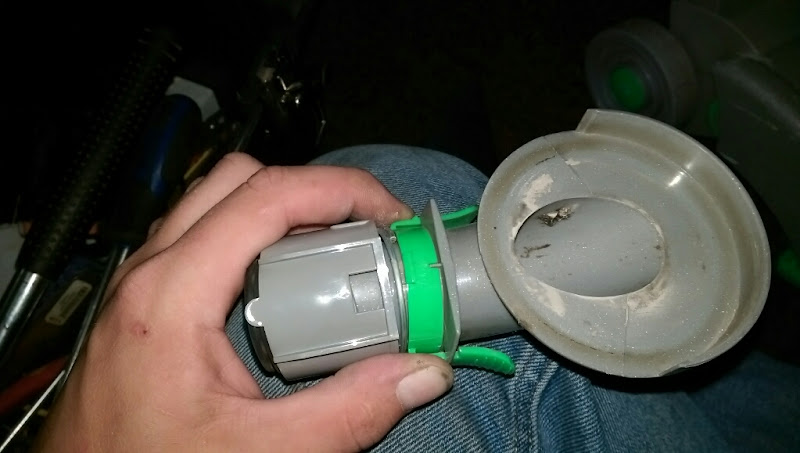
Now, back underneath and pull the little hose off the machine. The hose may come away from the grey end, pull the grey end off as well.


Now, very carefully rotate the brushroll housing around and lever it out of either end with something, being careful not to snap the locating tabs on the main cleaner housing


The internal hose unscrews from the brushroll housing, and needs to go in here


Now, get yer flatblade out and pop an edge of these locking circlips up


and remove it


Do the same on the other side


Lay the cleaner like so, then raise it slightly so the head flops down even further still. Whislt still in this position, you need to grab each edge by where it pivots


at the same time and it lifts off


Next, we need to work on the changeover valve. Start by popping the 2 small tabs holding the locking part in place


Push in and down and it moves the part away so it doesnt pop back in. Pull it out from underneath with your fingers


This bit is fun... Whilst gently pulling the top part away from the chassis, push up slightly underneath the black part so there's a gap enough for you to get the screwdriver in each end. Pop the tabs up gently


The black part should lift up once the grey part is clear of the chassis, but then get stuck. Slide the grey part out from the front, then wriggle the black part out, it will catch on the seal underneath


Pull the seal off the diverter valve, this is where the wand blockage u bend connects to


Either side of the chassis, where we pulled the front head off are 2 black locating rings. They pull out easily


Collector and restorer of vintage vacuums, Dyson Appreciator! Come and see my blog, where I am uploading all my mountains of brochures, manuals and other vacuum cleaner paperwork, and also my youtube channel @beko1987!

Offline beko1987

  • Member
  • Posts: 5044
  • Country: gb
  • Gender: Male
  • Let's take it apart!
    • My blog
Re: Dyson DC04i - Stripdown and Refurb
« Reply #1 on: August 04, 2015, 11:57:48 am »
Wheels now. Lever one of the vanity caps off


Lever the circlip off


and remove the wheel


Remove the 1 or 2 small washers that sit behind each wheel. Withdraw the axle and other wheel from the other side


To get the other wheel off, hold it by the wheel and smack the axle down onto the floor gently, it will pop the vanity cap off, and the wheel will slide off the axle, no need to remove the other circlip on the other end of the axle.

That done, pull the spine cable out of the chassis


Undo all the screws visible on the top of the motor housing, and it should fall off the chassis


There is a removable part of the airflow channel that can come out now. be VERY careful with the seal, 8 out of 10 I do are perished and snapped, the parts do glue together if you cant find another seal though...


The motor housing has a cover on it


Pull the back edges out and it slides off from the front


The motor is held in with a locking ring. Pop each tab out and it comes off easily


Push this part of the cable in slightly so the rubber end clears the housing


To remove the motor, push down on the housing with the belt spindle on the floor, this will pop the motor up slightly


The motor now pulls out from above


Retreive the metal belt guard from the motor mount

Remove the top motor mount


and the fancase motor mount


This motor is only in the non clutched DC04, all other dc04s, 7s and 14s use the common YDK. A YDK can be fitted I think but you need the YDK motor mounts too.

Undo the screws holding the diffuser onto the motor housing


and lift the diffuser out


Nearly there, onto the Cyclone unit now!


Open and empty the bin as usual


Remove the inner cone from the bin


Pull the 'Do Not Remove' seal from the top of the cone


and the smaller seal from the bottom of the cone


Next, open the filter lid on the top


and using a flat blade, pop the locating lugs off one side and remove the lid from the main unit


The handle is held on with 2 screws from underneath. Remove the screws and the handle just slides out


Be VERY careful with this bit too, non faded ones are hens teeth, they get really fragile with age and fading


This is the filter release catch, with its small spring


The filter wasnt too bad, will wash up well


Under the filter are the last 2 screws on the machine


The top cyclone and shroud slide out, possibly taking the bin to housing seal with it as it has done here


This is a messy part, you may want to pop outside for this...

Hold the shroud and cone very firmly by the shroud with both hands


and smack it hard on somethign soft but firm (the lawn, bit of old carpet etc) with enough force to crack the shroud off the cone, but not so much force it shatters the diffuser at the end of the cone...


There is a seal at the top of the shroud


This is the seal that may fall out when you remove the shroud and cone


Never EVER remove this peice, one of the little plastic lugs WILL snap on you, scrapping the part


Lastly is the bleed valve


With some VERY careful levering, the outer cover will pop out


With even more careful levering at the point shown, pop the valve out of the cover. It's held in with a big clip, this may snap off but even if it does the valve glues back into place well enough


To strip the valve, first pop the rear grey cover off


Under there, you need to pull the little rubber/plastic bit off, there's a spring underneath so be careful


It falls apart then


I never normally do this either but a sharp tap with a hammer and broad torx bit releases the little yellow bit


and there we go, the DC04 is componentised. Rebuild pics coming soon!
Collector and restorer of vintage vacuums, Dyson Appreciator! Come and see my blog, where I am uploading all my mountains of brochures, manuals and other vacuum cleaner paperwork, and also my youtube channel @beko1987!

Offline Tech12

  • Member
  • Posts: 742
  • Country: gb
  • Gender: Male
  • Electrical Appliance Engineer / Trainer.
Re: Dyson DC04i - Stripdown and Refurb
« Reply #2 on: August 04, 2015, 01:57:01 pm »
You sir are a complete vandal :)) :tiphat:
Repairs to All makes of Small Commercial & Domestic appliance. Power tool repair.
City & Guilds and PAT qualified engineer.

Offline beko1987

  • Member
  • Posts: 5044
  • Country: gb
  • Gender: Male
  • Let's take it apart!
    • My blog
Re: Dyson DC04i - Stripdown and Refurb
« Reply #3 on: August 04, 2015, 03:59:41 pm »
Hehe thanks! There's always a job thats made easier with a hammer.

Anyhoo, re-assembly! So, it's all washed, you've sat down infront of the sweeney and polished all the marks off, and cleaned the rubbers and are now ready for reassembly.


I'm not reassembling this in the same order as the stripdown, I forgot I was going to write a thread, so followed my usual order of events

Which starts with the motor!


A light smear of grease around the inner of the motor housing greatly assists in the refitting of the motor


Top mount refitted


This lines up with these locating pegs inside the motor housing


Fancase seal on


Refit the belt guard to the motor housing


Feed the cable into the motor housing


and push it home, making sure the pegs hit the holes and it goes fully in, with the cable grommit protruding out as it should


The motor should protrude a bit


As the retaining ring


Holds it all in place!


The motor housing cover trim snaps back onto the motor housing


You need the chassis now


and this duct


The seal is a pain to get to stay on, and I wouldnt think any less of you if you glued it on in frustration, but it is doable. Once refitted, it should be snug, as the screw mounting locates onto the chassis in the correct way so the motor housing lines up


A smear of grease on the motor rubber helps here, as you need to slide the motor assembly into place and past the end of that duct


Feed the spine cable back into place and out of the top of the chassis

Diffuser next


Changeover valve now


Assembled as above, so the seal on and the black part slid into the grey part, it will go in. Insert the back lugs first, manouver the grey part under the chassis points and it should all snap into place.


Refit the circlip


And then the seal. This is easier if you fit the top part first


Then rotate the whole seal/circlip assembly carefully round and fit the now-top part too

Re-assemble the removeable part of the changeover valve now. Refit the seal to the bottom of the grey part


Refit the chunky spring


and slide the 2 halves together. The bottom but has to be the right way round or it wont fit into the cleaner. You can offer it up off the machine to check before fitting, or just unclip and rotate it if incorrect


Time to refit this little chap, it pushes up from underneath


Refit the black pivot guides


Next, grab a nice new post motor filter


Lob an air freshener under the filter


Fit the filter


Fit the filter housing


I smear a drop of grease on the black pivot guides


then refit the housing, you need to pull both sides out again and drop over the pivot points. Fingers may be trapped, be prepared...


Be sure that the changeover valve isnt fouling the front housing, below is how it should look


Fit both retaining rings


Onto the brushroll housing next


Crack open a fresh internal hose and screw it on


Fit the hose first to the changeover valve, then fit the brushroll housing to the cleaner head.


Take a fresh belt


Next, grab the brushroll bearings we removed earlier, and using a small flatblade driver (or the switch removal tool), pop the black rings off either side of each bearing


Scrape out all the dried out grease, and re-pack with fresh


Pop the black caps back on, rotate it by hand to bed the grease in and re-assemble!


Make sure the edge bristles are at the same orientation, as they fit into the brushroll housing.

Fit the brushroll and belt to the housing


You now need to push/lift the belt over the motor spindle. It's do-able, but can be tough. Once done, rotate the brushroll by hand a few turns to centre the belt up everywhere.


Baseplate back on next


Back on with the wheels


Back on with the lower u-bend


Looking like a DC04 again!


Refit the top chassis seals


Wire the mains cable back up to the chassis cable. If you offer the housing up to the chassis, the part that starts to get thicker needs to be above the hole in the chassis, so the thin park fits through the cutout for the cable grommit, then the whole thing pushes down. Offering the cable hodler up to the housing, and noting where the cables need to start from helps here.


Take your hose (or your last clutchless DC04 hose you have  :( and fit it to the machine


Cord hook back onto the wand


Top cap back on, slide the front in first then push down at the back, manipulating the tabs to slot in


Wand cap back on


wand release catch back in. Insert the top first, as it locates in a cut out, then push each of the sides at the bottom in


All done, put the hose on the wand, fit the wand and wind the cable up!


Cyclone now! Fit the small seal to the top of the shroud


Snap the shroud back onto the cone (its easier than getting it off!)


Release valve now. The all palstic little cap fits into the seal as below


The black cage sits on top of this, and the spring sits inside, that little grey part stops the spring from coming out of the other side


The rubber and plastic part snaps onto the middle and holds it all together


Fit it back into the cyclone housing

Then drop the top cover on and snap into place


If you removed the little yellow insert, re-fit it with a drop of glue now.

Inser the shroud and inner cone into the top housing, maning sure the screw holes line it. It should only go in one way, as there is a cut out for the release valve internally. Screw it up.


Refit the top housing to bin seal around the bottom of the housing


Time to fit the top handle of the cyclone now. The small spring does hold onto the release elever fairly well, so you dont have to worry about that falling off. Locate the pivot points and spring intheir little places, then hold it all down with your thumb on one hand


and then lower the handle down onto it all


Fit the screws quickly to stop the spring popping everything back out again

Take your nicely washed filter, or a new one (or a previously washed one as I have here, with only mild staining...)


Close the handle, and the top of the cyclone is done!


Fit the lower seal to the bin insert


then the top seal, ensuring it is pushed down properly. It 'snaps' into place in a rubbery sort of way


You may need to moisten the lower seal to ensure it doesnt snag when you lower the inner into the bin now it's all clean and will grip the rubber. Ensure it's pushed in fully all the way round


Refit the cyclone


Grab your tools, or a new set if youve bought one


And done, enjoy your as-new DC04!


And add it to the rest...

Collector and restorer of vintage vacuums, Dyson Appreciator! Come and see my blog, where I am uploading all my mountains of brochures, manuals and other vacuum cleaner paperwork, and also my youtube channel @beko1987!

Offline Parwaz7862

  • Member
  • Posts: 3412
  • Country: gb
  • Gender: Male
  • Dyson geek 😃
Re: Dyson DC04i - Stripdown and Refurb
« Reply #4 on: August 04, 2015, 05:25:38 pm »
Very nice! Really detailed and I enjoyed reading it all, lol.

Offline Tech12

  • Member
  • Posts: 742
  • Country: gb
  • Gender: Male
  • Electrical Appliance Engineer / Trainer.
Re: Dyson DC04i - Stripdown and Refurb
« Reply #5 on: August 04, 2015, 05:29:24 pm »
Nice job, just hope she appreciates all the hard work you put in  :thumbsup:
Repairs to All makes of Small Commercial & Domestic appliance. Power tool repair.
City & Guilds and PAT qualified engineer.

Offline beko1987

  • Member
  • Posts: 5044
  • Country: gb
  • Gender: Male
  • Let's take it apart!
    • My blog
Re: Dyson DC04i - Stripdown and Refurb
« Reply #6 on: August 04, 2015, 05:52:36 pm »
Ah this is a selling one,  she bought something else a while ago,  despite me saying I would sort her out with a hose! Hey ho!

Had interest at £55, will see if it gets picked up in the week!
Collector and restorer of vintage vacuums, Dyson Appreciator! Come and see my blog, where I am uploading all my mountains of brochures, manuals and other vacuum cleaner paperwork, and also my youtube channel @beko1987!

Offline Tech12

  • Member
  • Posts: 742
  • Country: gb
  • Gender: Male
  • Electrical Appliance Engineer / Trainer.
Re: Dyson DC04i - Stripdown and Refurb
« Reply #7 on: August 04, 2015, 07:17:44 pm »
They'd be getting a bargain after what you've done to it, good luck with the sale.
Repairs to All makes of Small Commercial & Domestic appliance. Power tool repair.
City & Guilds and PAT qualified engineer.

Offline beko1987

  • Member
  • Posts: 5044
  • Country: gb
  • Gender: Male
  • Let's take it apart!
    • My blog
Re: Dyson DC04i - Stripdown and Refurb
« Reply #8 on: August 04, 2015, 08:41:26 pm »
That's the normal process.  Could do that in 35 mins to stripped,  45 mins for washing and packing the airing cupboard,  then another night 40 mins polishing it all and doing the seals,  then 40 mins reassembling.

Takes a surprisingly large amount of time doing the photos and step by steps! Then 2 odd hours typing it all oit,  copying the text snd links into word incase the session times out and I loose it all,  having to chop it up due to the character limit and posting it!
Collector and restorer of vintage vacuums, Dyson Appreciator! Come and see my blog, where I am uploading all my mountains of brochures, manuals and other vacuum cleaner paperwork, and also my youtube channel @beko1987!

Offline Dyson2000

  • Member
  • Posts: 224
  • Country: scotland
  • Gender: Male
  • Dyson Restorer and Collector!
Re: Dyson DC04i - Stripdown and Refurb
« Reply #9 on: August 05, 2015, 08:51:47 pm »
So Clean, Great Work! . I noticed you put a DC01 video on YouTube. that sounds exactly like mine. :grinn:

Offline beko1987

  • Member
  • Posts: 5044
  • Country: gb
  • Gender: Male
  • Let's take it apart!
    • My blog
Re: Dyson DC04i - Stripdown and Refurb
« Reply #10 on: August 11, 2015, 10:56:33 am »
Well this went last night! A chap who my girlfriend knows (she used to babysit his kids when they were younger, they dont remember her now) came round last night and part exchanged another DC04, which is also surprisingly clean and unfaded! Has a stupid aftermarket hose on that I want to change, but would need to dig some unclean ones out of the shed and get them washed, and not sure when I'll get the time to do that, so may just have to keep the pattern hose on..

So, £40 and this, deal done


I've already done a clutched DC04 rebuild thread, so wont be doing another one!
Collector and restorer of vintage vacuums, Dyson Appreciator! Come and see my blog, where I am uploading all my mountains of brochures, manuals and other vacuum cleaner paperwork, and also my youtube channel @beko1987!

Offline beko1987

  • Member
  • Posts: 5044
  • Country: gb
  • Gender: Male
  • Let's take it apart!
    • My blog
Re: Dyson DC04i - Stripdown and Refurb
« Reply #11 on: August 11, 2015, 10:57:52 am »
So Clean, Great Work! . I noticed you put a DC01 video on YouTube. that sounds exactly like mine. :grinn:

Is that the DC01 Standard that sounds very loud? If so, the base plate was catching on the belt slightly due to a broken screw fastner causing it to sit very slightly on the piss. Some quick stanley blade action had the offending peice removed and she is fairly silent once more!

Got a DC01 Absolute+ to do next, but want a new cleaner head and hepa filter for it before I start...
Collector and restorer of vintage vacuums, Dyson Appreciator! Come and see my blog, where I am uploading all my mountains of brochures, manuals and other vacuum cleaner paperwork, and also my youtube channel @beko1987!

DC04 Spare Parts


Trade Dyson Spare Parts


Dyson Spare Parts


Freestanding Dyson Cordless Vacuum Stand


Buy a Dyson DC04 Wand Handle


Buy a police truncheon


Instagram

Dyson Spares, Parts, Advice   Follow us on Twitter

Manchester Vacs on Instagram

Registration